Maintenance
Maintenance menu is the last main menu on the WebUI on the RSAES Industrial Managed Ethernet Switch. Figure 5.1 shows all submenus under the Maintenance menu. Under this menu, the user can restart the device through the WebUI, reset the configuration of the device to the original factory default settings, upload new firmware image to update the device, and manage the configuration of the device. The following sections will describe each submenu under the Maintenance menu.
Restart Device
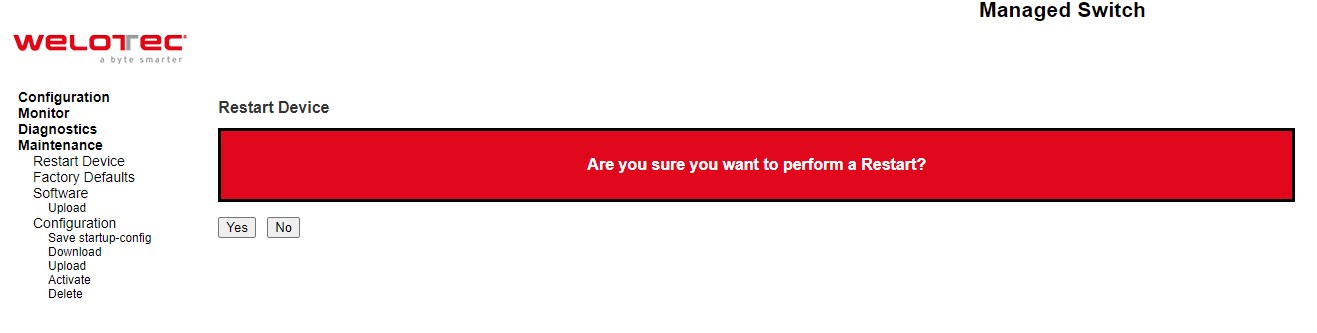
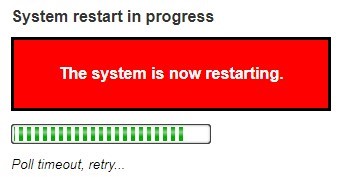
To restart the managed switch (or device) through the WebUI, the user can select the Maintenance⭢Restart Device menu. The Restart Device webpage is showed in Figure 5.2. The user can click on the Yes button to restart the device. During the restarting process, the webpage will be displaying the progress of the restarting operation as shown in Figure 5.3. Note that if the user selects the No button, the web browser will return to the Port State Overview webpage without restarting.
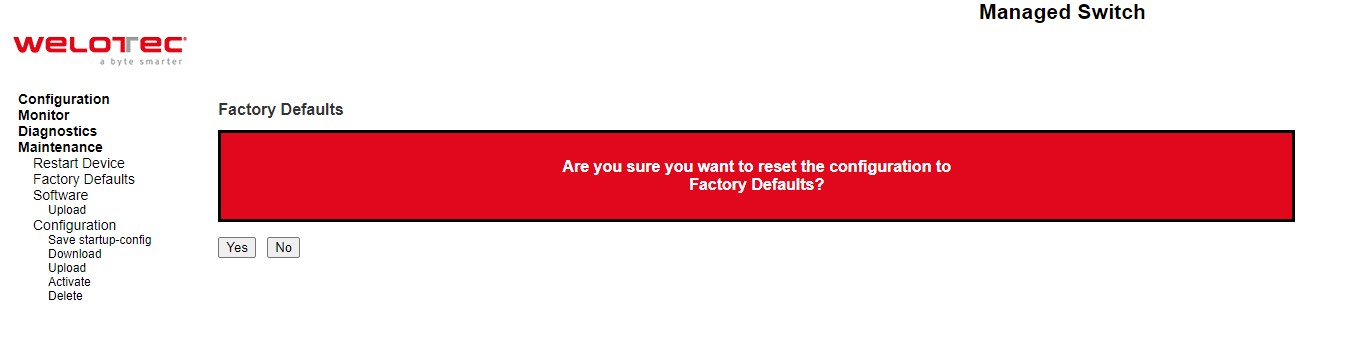
Factory Defaults
When the managed switch is not working properly, the user can reset it back to the original factory default settings by selecting Maintenance⭢Factory Defaults menu. Note that the IP configuration will not be changed after using this menu. The Factory Defaults webpage is shown in Figure 5.4. The user can click on the Yes button to reset the configuration to factory default settings. When the reset process is done the user will be presented with a message as showed in Figure 5.5. The new configuration will be available immediately and no restart is necessary. Note that if the user selects the No button, the web browser will be returned to the Port State Overview webpage.

Note: The switch can also be reset to factory defaults by pressing the reset Button for >10s
Software
This Maintenance⭢Software submenu allows the user to update the firmware for the device and check or select the current software/firmware image on the device.
Upload
The users can update the device firmware via web interface using Upload menu as shown in Figure 5.6. To update the firmware, the users can download a new firmware from Welotec’s website and save it on a local computer. Then, the users can click Select File… button and choose the firmware file that is already downloaded. The switch’s firmware typically has a “.dld” extension such as RSAES-KXXXAXXX.dld. After that, the users can click Start Upgrade button and wait for the update process to be done. After the software image is uploaded, a webpage will display a message stating that the firmware update is initiated. After a duration of approximately one minute, the firmware will finish update and the switch will be restarted.
Warning: While the firmware is being updated, web access will appear to be defuncted. The front LED flashes Green/Off with a frequency of 10 Hz while the firmware update is in progress. Do not restart or power off the device during this time otherwise the switch may fail to function afterwards.
Note: please make sure that the switch is plug-in all the time during the firmware upgrade.
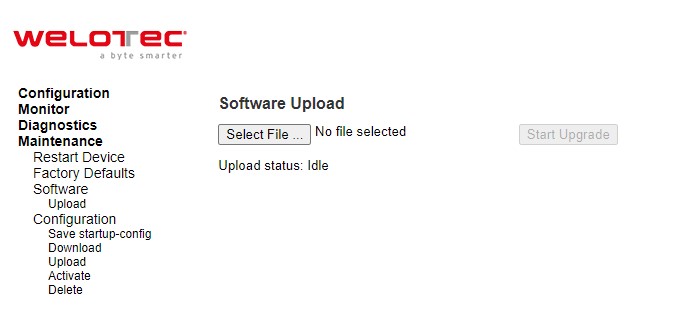
Image Select
The user can check the current image’s filename, version, and date on the device by selecting Image Select menu. An example of the Software Image Selection webpage is shown in Figure 5.7. Table 5.1 summarizes the description of Software Image Selection webpage.
Note: The firmware version and date information may be empty for older firmware releases. This does not constitute an error.
Table 5.1 Descriptions of Software Image Selection:
Label |
Description |
|---|---|
Image |
The file name of the firmware image, from when the image was last updated. |
Version |
The version of the firmware image. |
Date |
The date where the firmware was produced. |
Configuration
The managed switch stores its configuration in a number of text files in command line interface (CLI) format. The files are either virtual (RAM-based) or stored in flash on the switch. The available configuration files are:
running-config: A virtual file that represents the currently active configuration on the switch. This file is volatile or disappeared when the power is off.
startup-config: The start-up configuration for the switch which is read at boot time. If this file does not exist at boot time, the switch will start up in its default configuration.
default-config: A read-only file with vendor-specific configuration. This file is read when the system is restored to default settings.
Up to 31 other files, typically used for configuration backups or alternative configurations.
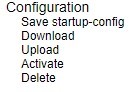
The Configuration menu enables the user to manage the configuration file on the switch. Under the Maintenance⭢Configuration menu, there are Save startup-config, Download, Upload, Activate, and Delete submenus as shown in Figure 5.8.
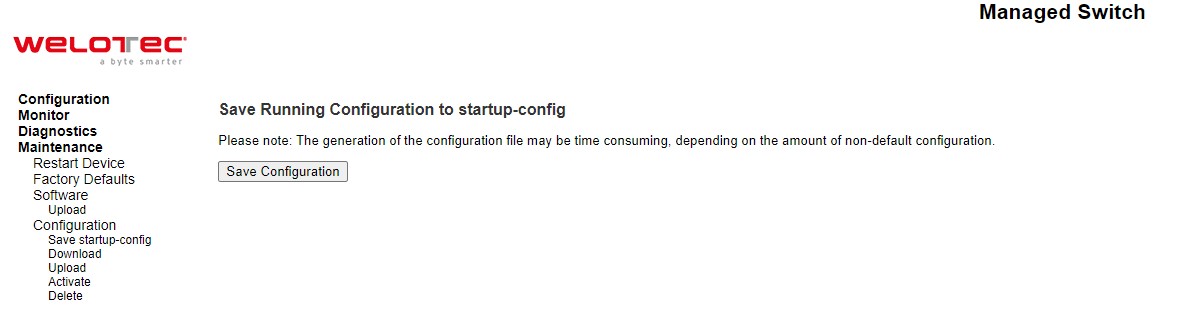
Save startup-config
The managed switch can save the start-up configuration inside the device. The webpage shown in Figure 5.9 allows the user to generate the start-up configuration file inside the managed switch. When the configuration file generation was finished, a message as shown in Figure 5.10 will be displayed on the webpage. This menu copies running-config to startup-config; therefore, ensuring that the current active configuration will be used at the next reboot.
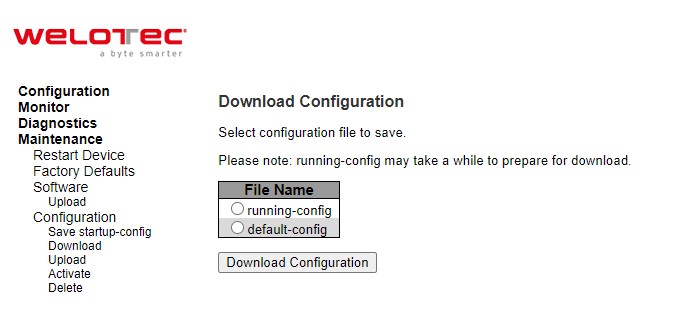
Download
The user can download different configuration files from the managed switch to the local computer using the web browser. There are running-config, default-config, and startup-config files that can be chosen as shown in Figure 5.11. To select the file name to be downloaded, check the radio button in front of the file name, then click on the Download Configuration button. The chosen configuration file will be downloaded by the web browser on to your local computer.
Upload
On this web page, the user can upload a local configuration file on the user’s computer to the managed switch using web browser. This will be useful when the user would like to use a backup configuration file from another managed switch. To upload a configuration file, select the Choose File button as shown in Figure 5.12 to open a file chooser on the personal computer. Then, select a configuration file on your device. Next, the user can select the name of Destination File on the managed switch from the two given file names which are either running-config or startup-config. Note that the runningconfig file name also has two possible parameters or options that can be chosen which are Replace or Merge. Also, the defaultconfig file is read-only; therefore, the user cannot choose it for uploading. That means the upload configuration file can be used to replace the running-config file on the managed switch or can be merged with the running-config file on the managed switch. The last option for the File Name is to create a new file by selecting the radio button in front of Create new file option in which the user can enter the new file name in the text field under the Parameters column. Finally click on the Upload Configuration button to start the upload process. A message “Upload successfully completed” will be displayed on the webpage.
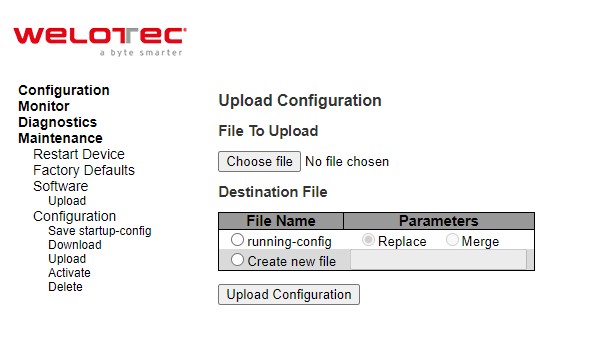
If the destination is running-config, the file will be applied to the switch configuration. This can be done in two ways:
Replace mode: The current configuration is fully replaced with the configuration in the uploaded file.
Merge mode: The uploaded file is merged into running-config.
If the flash file system is full (i.e., contains default-config and 32 other files, usually including startup-config), it is not possible to create new files. Then, an existing file must be overwritten or another file must be deleted.
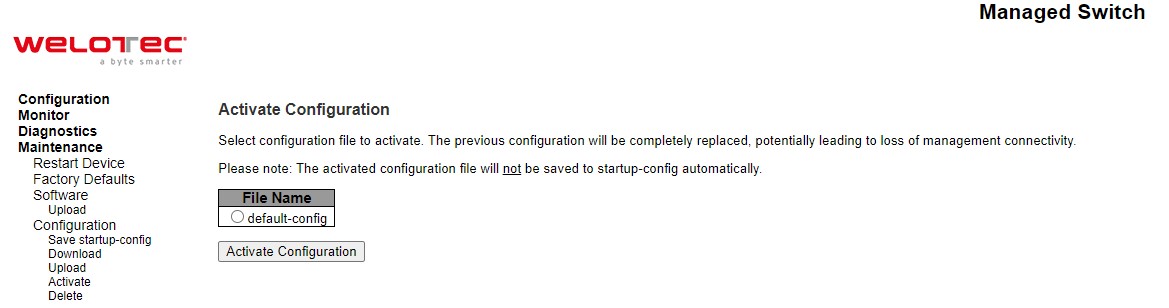
Activate
The user can activate different configuration files inside the managed switch, except for running-config which represents the currently active configuration. The Configuration⭢Activate submenu under the Maintenance menu as shown in Figure 5.13 can be used to perform this task. The user can select a configuration file from the list under the File Name table by checking on the radio button in front of that file name. Then, click on the Activate Configuration button. After the activation process is completed, the webpage will be updated to display the Status and Output as shown in Figure 5.14.
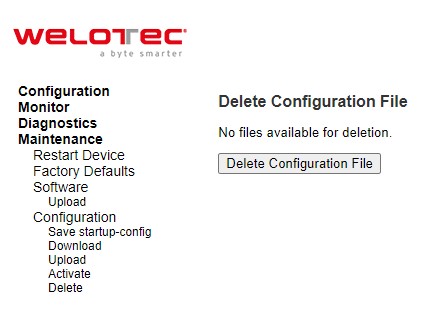
Delete
The last submenu under the Maintenance⭢Configuration menu is Delete. This webpage allows the user to delete usercreated configuration file stored in flash memory, including startup-config, as shown in Figure 5.15. Note that default-config cannot be deleted by this menu. For example, the startup-config file can be created by the Save startup-config menu and then can be deleted by this Delete menu. To remove a configuration file, select the file name by checking on the radio button in front of that file under the File Name table. Then, click on the Delete Configuration File button. Note that a pop-up window will be prompted for a confirmation by the user as shown in Figure 5.16. If the user really wants to delete the configuration, the user can click on the OK button. If the user wants to change the decision, the user can click on the Cancel button. When the deletion is completed, a message will be presented on the webpage such as “startup-config successfully deleted”. Note that if this is done and the switch is rebooted without a prior Save operation, this effectively resets the switch to default configuration.